Saleforce Mobile SDK and Ionic – Display Contact Details
Brett M. Nelson - Wednesday, July 19, 2017
So far we have a big list of contacts but what if we wanted to display just the details for one contact? Most of what is required we have already done but I don't want to just magically poof the page into existence so lets add it real quick.
Update ContactsServiceProvider
In the ContactsServiceProvider lets add a new method called getContact that has one parameter named id of type string. It will be almost the same as loadContacts but the query will ask for more detail and include a WHERE clause to get just the one contact with the id that is passed in. Get it?
getContact(id:string)
getContact(id:string) { let oauth = OAuth.createInstance();
return oauth.login() .then(oauthResult => { let service = DataService.createInstance(oauthResult);
  return service.query(\`SELECT Id, FirstName, LastName, Name, Email, MobilePhone FROM Contact WHERE Id = '${id}'\`);

});
}
This returns a promise so lets add the a ContactDetails page to call it and make use of the promise.
Add ContactDetails Page
To add a ContactDetails page we will add a page like we did when we added the Contacts page. The main difference will be we will call it ContactDetails and not Contacts. So let's use Generate and add it now with ionic generate page contactDetails.
Don't forget to
importtheContactDetailsPagefrom'../pages/contact-details/contact-details'and add it to thedeclarationsandentryComponentsin thesrc/app/app.module.tslike we did with thecontactspage.
In the contact-details.ts file we will need to import the ContactsServiceProvider and inject it into the constructor as private with a name of service (sound familiar?). Then we can create a method that calls the this.service.getContact method, let's call it getContact and have it take one parameters named id of type string. The id we will pass to the service.getContact method and then we will handle the promise by storing the first item from the results.records on a property called contact.
BTW you should create a property called
contactof typeany.
We will need to call the new method from the ionViewDidLoad method. To get the id we will get it from the navParams.data by passing in the name we expect the parameter to be like this this.navParams.data['id'].
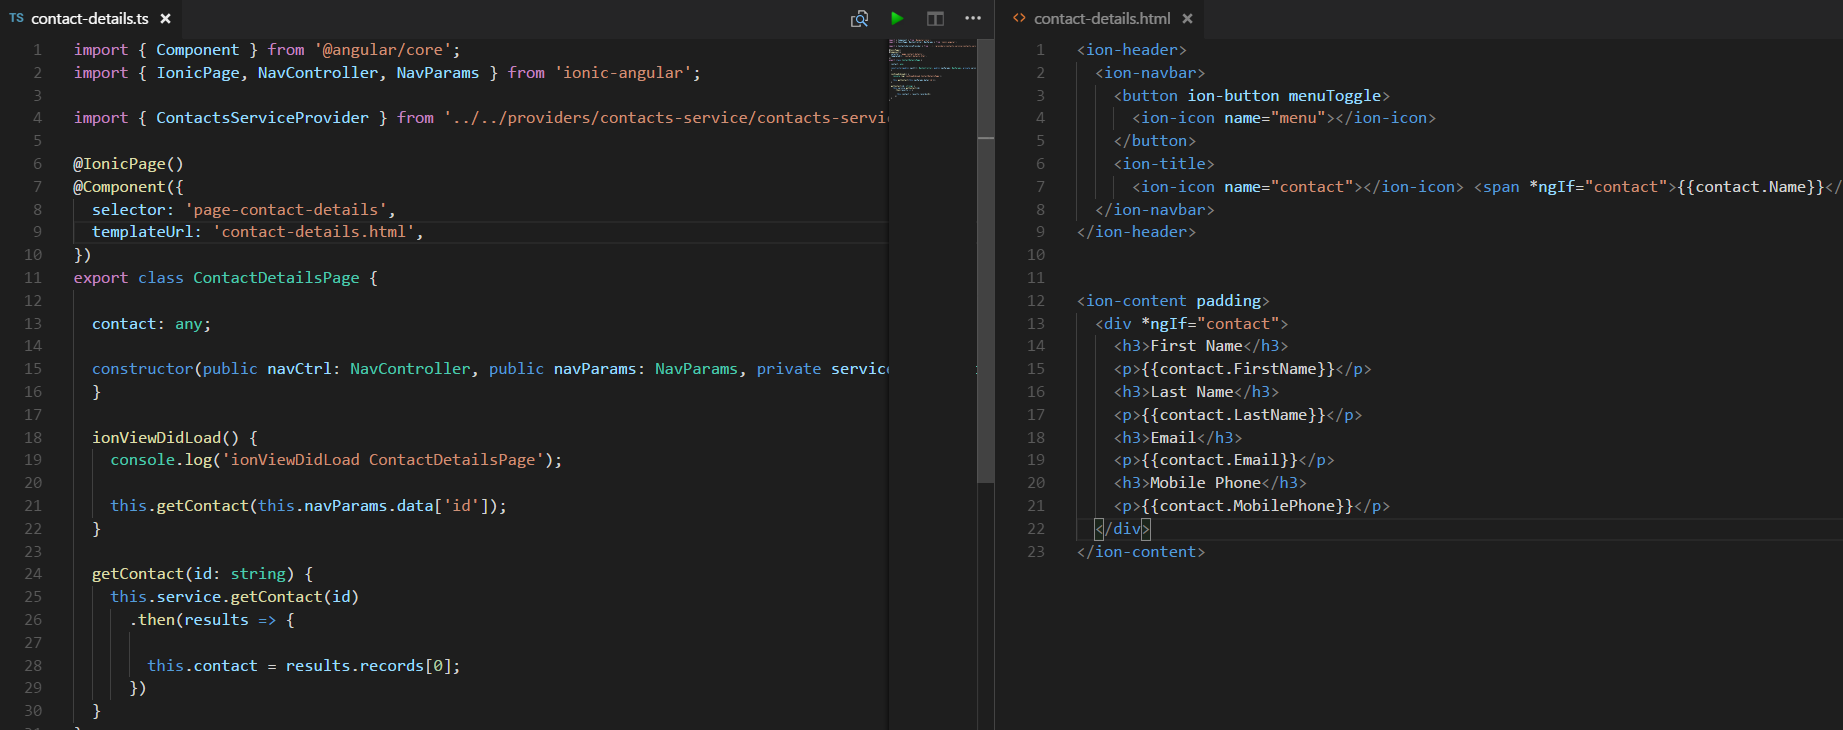
Complete contact-details.ts
import { Component } from '@angular/core'; import { IonicPage, NavController, NavParams } from 'ionic-angular';
import { ContactsServiceProvider } from '../../providers/contacts-service/contacts-service';
@IonicPage() @Component({ selector: 'page-contact-details', templateUrl: 'contact-details.html', }) export class ContactDetailsPage {
contact:any;
constructor(public navCtrl: NavController, public navParams: NavParams, private service: ContactsServiceProvider) { }
ionViewDidLoad() { console.log('ionViewDidLoad ContactDetailsPage');
this.getContact(this.navParams.data\['id'\]);
}
getContact(id:string){ this.service.getContact(id) .then(results =>{
this.contact = results.records[0]; }) } }
I removed the comments about it being a generated class to would take up less space
Now we will need to update the html template to make use of the contact that we load when the view loads. We will use the Name from the contact in the ion-header an use an ion-icon to give it a little flair. Then
Complete contact-details.html
First Name
Last Name
Mobile Phone
If you are wondering about the
*ngIf="contact"we only want to show the elements that require the contacts properties when it's been populated so we don't get an error. There may be a better way to handle this but for now it works :)
Now we just need to be able to navigate to our contactDetails page.
Update Contacts Page
To add a way to navigate to the contactDetails page we are going to add a method to our ContactsPage class. If will be called something along the lines of selectContact and take one parameter named id of type string. It will then use this.navCtrl that was stored with the constructor to push a ContactDetailsPage onto the Navigation Stack along with an object that has a property of "id" that we give the value of the id that was passed in. This is where the id that is used to load the contact on the contactDetails page is specified.
We will need to
importtheContactDetailsPagefrom'../contact-details/contact-details'to get access to it.
selectContact Method
selectContact(id:string){ this.navCtrl.push(ContactDetailsPage, {"id": id} ); }
The last thing we need to do is bind the selectContact method to the click event of the ion-item in the html template while passing in the current contact's Id.
Updated HTML Template ion-item
<ion-item *ngFor="let contact of contacts" (click)="selectContact(contact.Id)">
</ion-item
That's it!
Let's see it in action!
Action!
Conclusion
Now we can see individual detail for each contact, isn't that nice?
Don’t forget to sign up for The Weekly Stand-Up! to receive free the WIP Developer.com weekly newsletter every Sunday!
Looking for the code and want to follow along? Find it on GitHub.com/BrettMN/salesforce-sdk-mobile-with-ionic-starter