Saleforce Mobile SDK and Ionic – Edit Contact Part I
Brett M. Nelson - Thursday, July 20, 2017
Now that we can view a Contacts Details we should come up with a way to edit them. Let's set something up to handle editing now.
Update ContactServiceProvider
To edit a contact we will need some way to tell Salesforce of our changes. Since we are collecting all our calls to Salesforce in the ContactsServiceProvider let's add a new method called updateContact. This new method will take one parameters called contact and I'm going to give it a type of { Id: string, FirstName: string, LastName: string, Email: string, MobilePhone: string }.
What that type means is
contactwill be an object with properties namedId,FirstName,LastName,MobilePhoneall of typestring.
Then we will get an instance of the oAuth and use it's login method, and creating an instance of the DataService with the results. All so we can call service.update passing in the name of the object to update and the object that contains the updates.
It should look somewhat like this:
updateContact Method
updateContact(contact: { Id: string, FirstName: string, LastName: string, Email: string, MobilePhone: string }) { let oauth = OAuth.createInstance();
return oauth.login() .then(oauthResult => { let service = DataService.createInstance(oauthResult);
  return service.update('Contact', contact);

});
}
With the call to Salesforce ready we can create the page that will make use of it.
Create contactEdit Page
Lets create a page to handle editing a contact called contactEdit. So let's call ionic generate page contactEdit and get started.
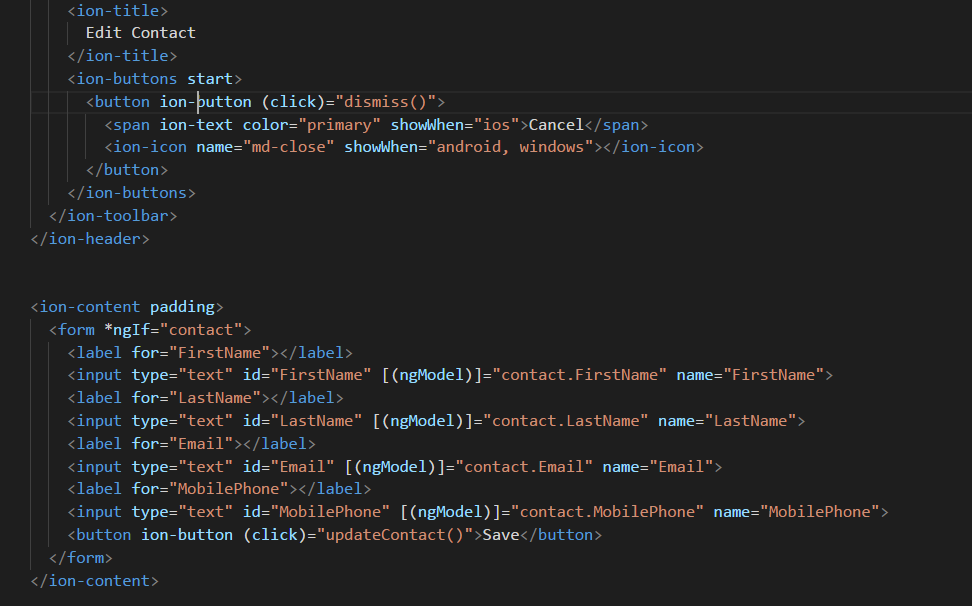
We will use the contactEdit page to edit the FristName, LastName, Email, and MobilePhone. We will use the Angular [(ngModel)]="" binding, sometimes referred to as a "banana in a box", to use "2 way data flow" or "2 way binding". This will allow us to set the original value of the input field and update the view model when we make changes.
We will also only show the form when we have a contact to prevent it from having rendering errors similar to what we did on the contact-details.html.
There are going to be two buttons on the html template, one in the ion-header to call a method to dismiss the modal and one in the form to save changes.
Here's the complete html template.
Complete contact-edit.html
Conclusion
We'll get the rest setup next time. Think you can figure out what is needed before then?
Don’t forget to sign up for The Weekly Stand-Up! to receive free the WIP Developer.com weekly newsletter every Sunday!
Looking for the code and want to follow along? Find it on GitHub.com/BrettMN/salesforce-sdk-mobile-with-ionic-starter