Salesforce Mobile SDK and Ionic – Styling Actions - Part II
Brett M. Nelson - Thursday, August 17, 2017
Since we left off in the middle of updating the looks of the actions on our Contact Details page we should probably get back to it.
More contact-detail.ts Updates
The last thing we are going to do is add a method called something like showActions, of course, you may choose a different name if that is fancy though.
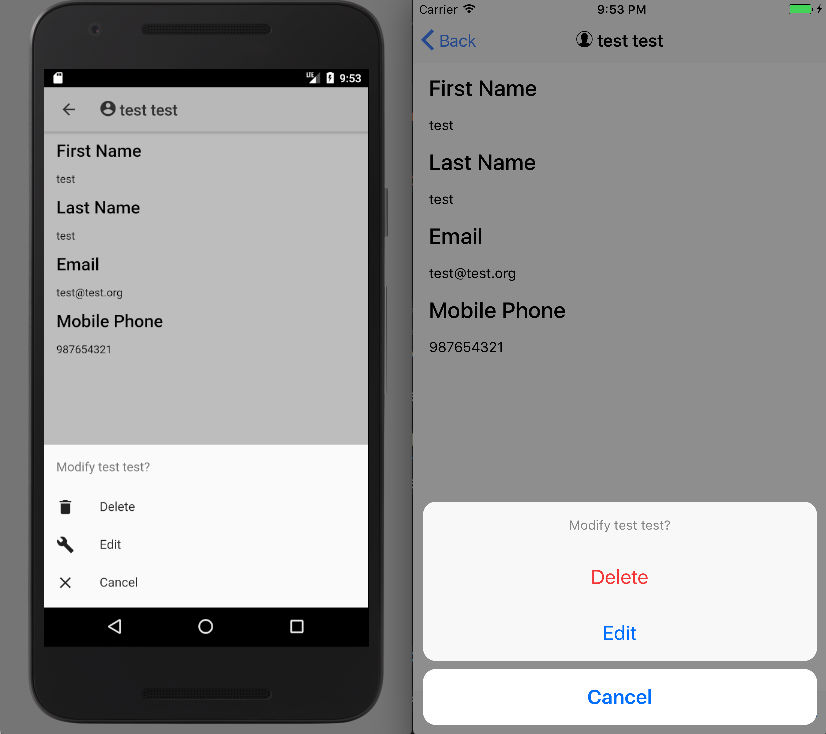
This method will use the ActionSheetController we added as an import and injected into the constructor as actionSheetCtrl to create a new Action Sheet. In the process of calling create we will pass in an options object that will have a title property that will have a value of a string and a buttons property. The buttons property will have a value of an array of buttons.
For the title we can use a string template and put the name of the contact we are on.
For the buttons each will have a title, an icon (provided it's not ios) and a handler. Some buttons will have a role property to help position, or color the button depending on the role.
showAction Method
showActions() { let actionSheet = this.actionSheetCtrl.create({ title: `Modify ${this.contact.Name}?`, buttons: [ { text: 'Delete', role: 'destructive', icon: !this.platform.is('ios') ? 'trash' : null, handler: () => { actionSheet.onDidDismiss(() => {
        this.deleteContact();
      });
    }
  },
  {
    text: 'Edit',
    icon: !this.platform.is('ios') ? 'build' : null,
    handler: () => {

      actionSheet.onDidDismiss(() => {

        this.updateContact();
      });
    }
  },
  {
    text: 'Cancel',
    role: 'cancel',
    icon: !this.platform.is('ios') ? 'close' : null
  }
\]
});
actionSheet.present(); }
For the button handlers you can see we are calling the deleteContact or updateContact depending on the button selected when the onDidDismiss event it called.
Using onDidDismiss allows you to wait till the Action Sheet has been dismissed before calling a followup action or even that may have conflicts if used at the same time. With out using onDidDismiss the Alert Controller's buttons would trigger the methods called but would not dismiss the alert window.
With all that set we will need to update our markup before we can see it in action.
Update contact-details.html
On the contact-details.html we will need to remove the buttons we already have in place. So go on an delete the Edit and Delete buttons.
With those gone we will add an ion-footer that contains an ion-toolbar. The ion-toolbar will contain an ion-buttons that has one button. That button will have a click handler that calls the showActions method. I'm also going to have the button have text that says Modify and an ion-icon with a name of settings so that we the international symbol for change things.... a gear.
The updated contact-details.html should look something like this.
Updated contact-details.html
First Name
Last Name
Mobile Phone
And now we should be able to run it.
Run It
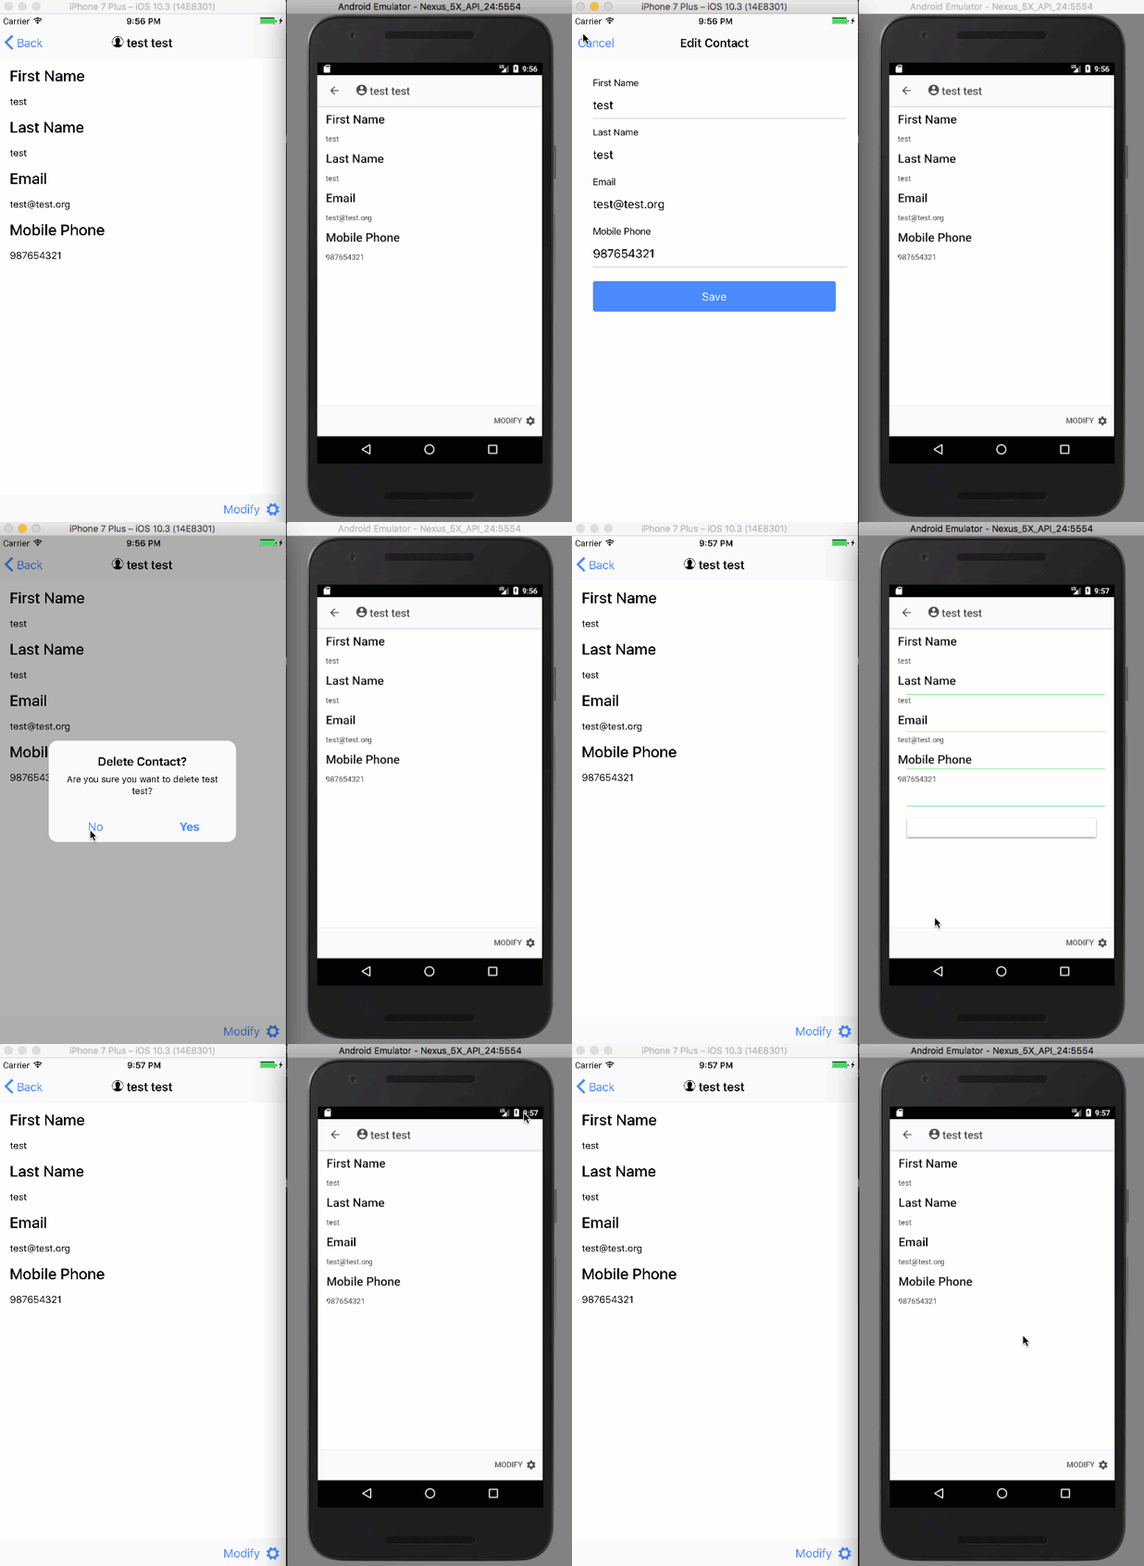
Now let's see how it looks when we run it on Android and iOS.
Run It
Well that looks a little better.
Conclusion
Don’t forget to sign up for The Weekly Stand-Up! to receive free the WIP Developer.com weekly newsletter every Sunday!
Looking for the code and want to follow along? Find it on GitHub.com/BrettMN/salesforce-sdk-mobile-with-ionic-starter
