Using ForceJS with Vue.js - Part VI - Creating Salesforce Objects
Brett M. Nelson - Thursday, March 23, 2017
A quick recap: so far we have set up our app, queried Salesforce.com using ForceJS and ForceSever with Vue.js, created a reuseable service, event hub and pass parameters through URL and Update Salesforce object. Now lets create a new Salesforce object
Update sfService
We will began by adding a new function to our sfService called create after our update function in the public function. We will also update our return object to expose the create function. All in all the changes should look like this:
app/services/sf.service.js Updated to Create!
function create (objectName, value) { return getDataService() .then(dataService => { return dataService.create(objectName, value) }) }
// return object return { query: query, update: update, create: create }
Without new function in place lets add a new component to call the create.
Create new-contact Component
Crete a new JavaScript file named new-contact.js in your component folder. The new component will have a template, data function, and one method.
The template will contain our form with an input for First Name, Last Name and Languages. You may wonder why we are using First Name and Last Name instead of just Name the Contacts object name field is actually a combination of the first and last name so to set the name we have to set the fields individually but we can query it by just the Name field.
The data function will return an object with 3 property's all set to null: firstName, lastName, and languages. These will be bound to our inputs and be used to create the object we send to Salesforce to create our new Contact.
Our one method will be to save the contact. I called mine saveContact and it is bound to a button in the template. It creates the object that we will send to the sfService.create function to create our new Contact.
It should look something like this:
Our Brand Nwowew app/components/new-contact.js
let newContactVM = Vue.component('new-contact', { template: `
Name:
Name:
Languages:
  <div class="col-xs-6">
    <router-link to="/" class="btn btn-danger btn-block">Cancel</router-link>
  </div>
  <div class="col-xs-6">
    <button v-on:click="saveContact()" class="btn btn-success btn-block">Save</button>
  </div>
</div>
Add Some Navigation
Now we need to have a route that can access our new component so lets update our routes in app/app.js.
Our New Route
{ name: 'newcontact', path: '/newcontact/', component: newContactVM }
This makes it so we can add a router-link after our Load <button> in our contacts template:
contacts router-link
And Action!
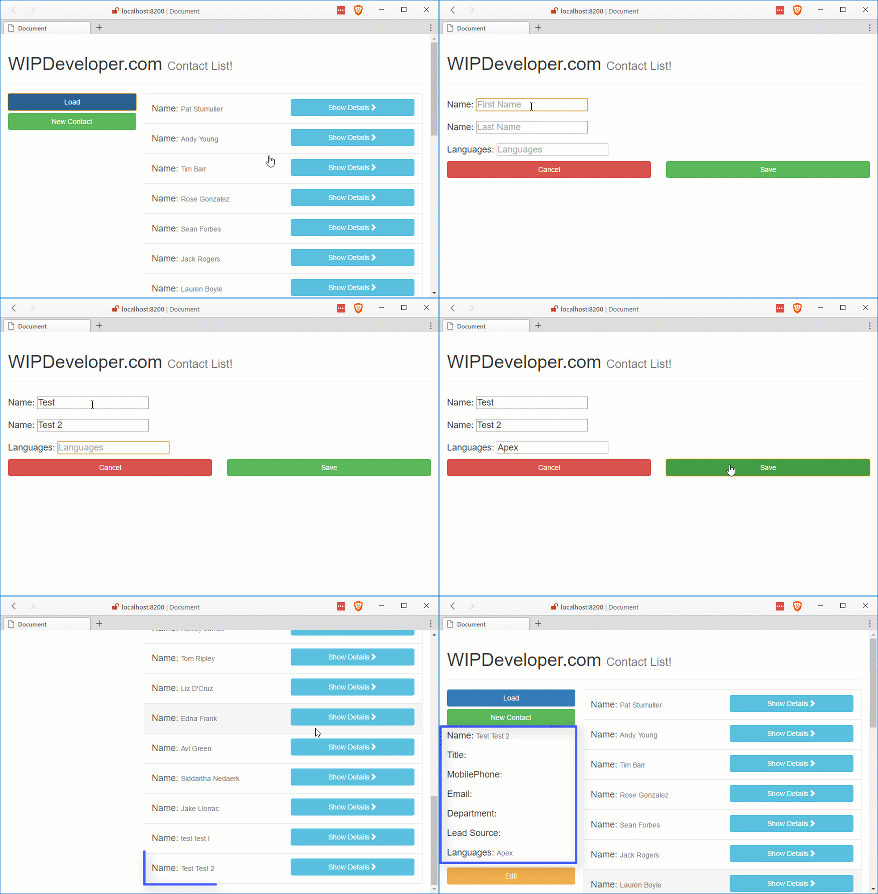
Run the app and see if we can create a new component.
New Contact

Conclusion
Now that we can add Contacts maybe we should see about deleting them. What do you think? Let me know by leaving a comment below or emailing [email protected].