Saleforce Mobile SDK and Ionic – Adding Ionic to Mobile SDK – Part IV
Brett M. Nelson - Monday, July 10, 2017
We have an app that has both the Salesforce Mobile SDK and the Ionic Framework and it runs! Before we can really call it a success we should get it to list the users for the Org similar to the app created with just forcedroid. How about we add the user list to display on the home page?
Add ForceJS
The Salesforce Mobile SDK app starts out with a version of ForceJS. Since we didn't keep that copy and we want to be able to use TypeScript import statements we will be adding ForceJS through NPM.
npm install forcejs --save
PS D:\Workspace\Blog\salesforce\ionic\ionicContacts> npm install forcejs --save npm WARN optional SKIPPING OPTIONAL DEPENDENCY: [email protected] (node_modules\fsevents): npm WARN notsup SKIPPING OPTIONAL DEPENDENCY: Unsupported platform for [email protected]: wanted {"os":"darwin","arch":"any"} (current: {"os":"win 32","arch":"x64"})
- [email protected] added 115 packages in 9.448s PS D:\Workspace\Blog\salesforce\ionic\ionicContacts>
If you want to know more about ForceJS there are some post available were we used it with previous topics here.
With ForceJS installed we can start updating our TypeScript
Update home.ts
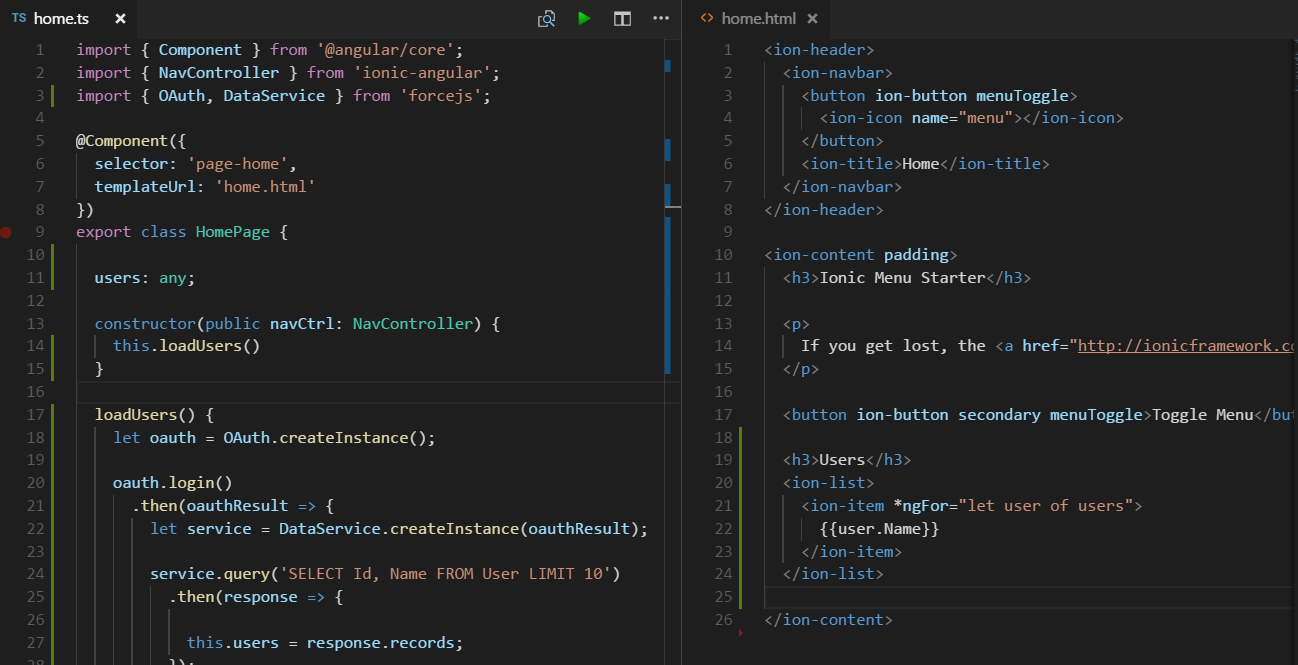
First thing we will need to do is import the OAuth and DataService from ForceJS. We will do this at the top of the home.ts so we can access the them later in the body of our class.
Import Statement
import { OAuth, DataService } from 'forcejs';
In the HomePage class we will need to add a property to save the users to, let's add one called users of type any.
Define users
users: any;
We will also a method to load the users, I think I will call it loadUsers but if you have a better name feel free to use that :) This method will create an OAuth instance, call login on that instance. Then in the promise results of that login we will create an instance of the DataService by passing in the results of the oauth login. We will then be able to use this service to execute a query that will return a promise that results should contain the users. we queried for.
Sound complicated yet?
loadUsers Method
loadUsers() { let oauth = OAuth.createInstance();
oauth.login() .then(oauthResult => { let service = DataService.createInstance(oauthResult);
  service.query('SELECT Id, Name FROM User LIMIT 10')
    .then(response => {

      this.users = response.records;
    });
});
}
This is storing the results on our user property we defined on line 11 so we will need to update home.html as well if we want to see anything. First though, let's add a call to this.loadUsers() in the constructor so that we load the users when ever the page is opened.
Updated constructor
constructor(public navCtrl: NavController) { this.loadUsers() }
Update home.html
With the controller update we will need to update the html for the Home tab to display the users.
This will be somewhat easy. I'm going to add an h3 to have a heading for the user list then an ion-list that contains a div with an ion-ion that has an *ngFor on it to repeat over the users. Then we will bind the user.Name as the text on the repeated ion-item. Something like lines 19 - 24 bellow.
Update home.html
Ionic Menu Starter
If you get lost, the docs will show you the way.
Users
</ion-item>
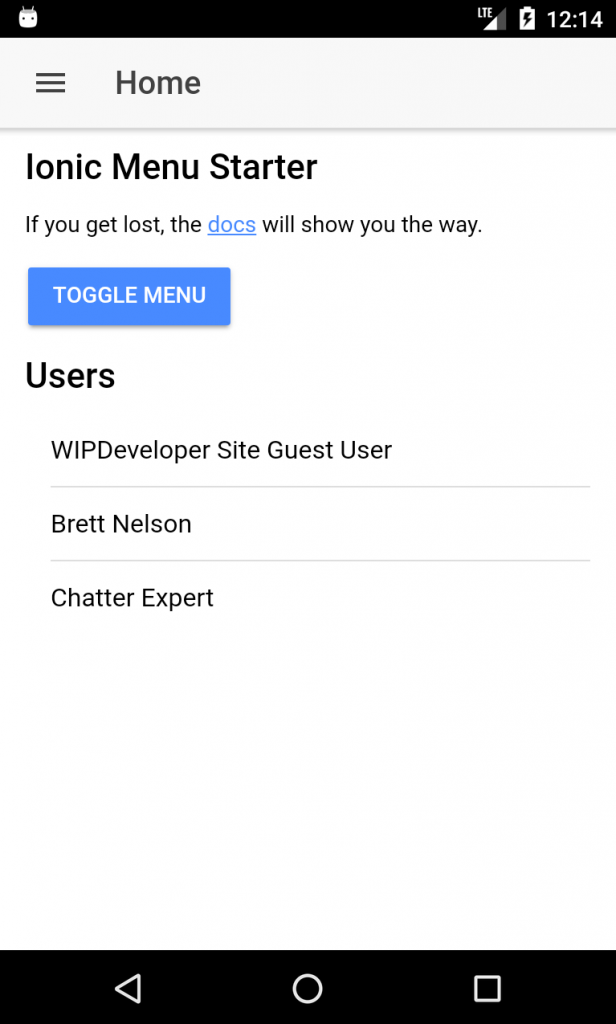
Now we should be ready to see our user list again.
Run The App
Now you should be just a quick npm run build and cordova prepare away from being able to run this in Android Studio.
Use List on Home Page

Conclusion
All that work and we just got back the feature we started with. Now we can start adding new things, like our Contacts Page!
Don’t forget to sign up for The Weekly Stand-Up! to receive free the WIP Developer.com weekly newsletter every Sunday!